This document
contains screen shots and instructions to setup a basic Running Allfix System. There are
many more things you can do to automate and make life easier, but following
these steps will get you started!
- I assume no liability what so ever if you follow any of the steps outlined
below. I am simply showing what I had to do to setup my Allfix system.
- My thanks goes to the following people:
- Harms Software - for writing Allfix
- Lord Time - for Motivating me to get this tutorial Done
- Roger Shays -For Creating this tutorial and
making the screen captures possible:
Step #1
UnRAR, UnZIP or otherwise de-arc the Allfix files into a
directory of your choice. For purposes of this tutorial I have used C:\sbbs\allfix
(how original! )
Step #2
Open up a dos window and go to the sbbs\allfix dir then type asetup
This is what you'll see:

You will notice the first Highlighted Tab, Click on the system data tab
And we will begin setup. You should see the following below

We will Now begin to setup our system addresses click on address maintence and see below illistration

Starting with network address Click on it and see example below to help with info
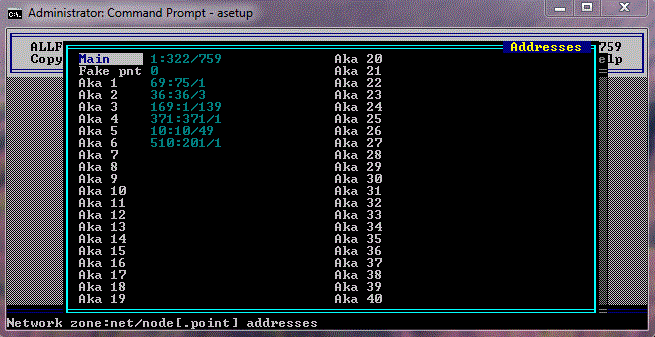
Next we will Begin with the Entering of Your Site info click on the site info tab See below example
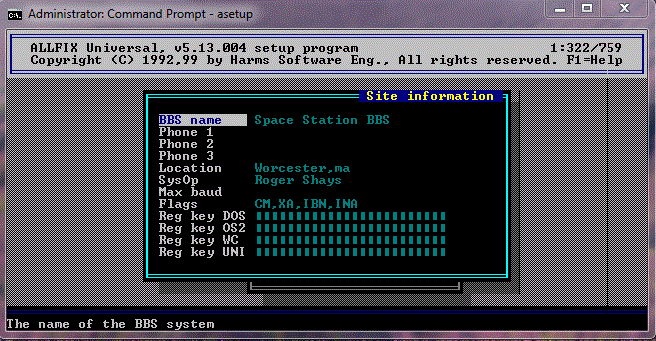
After Site info is all setup you will see the aka matching tab
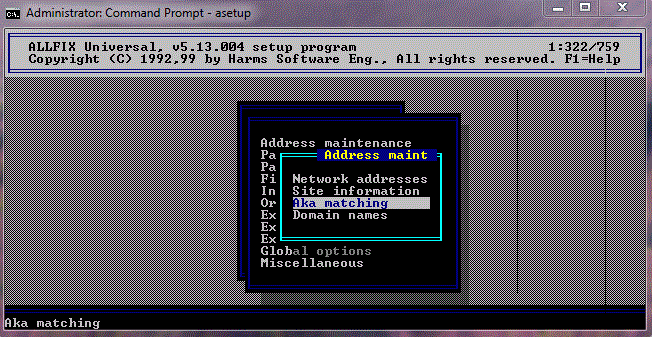
Click AKA matching tab to begin setting up the aka's using the example below
Note after entering zone Use your Node Address in the aka field
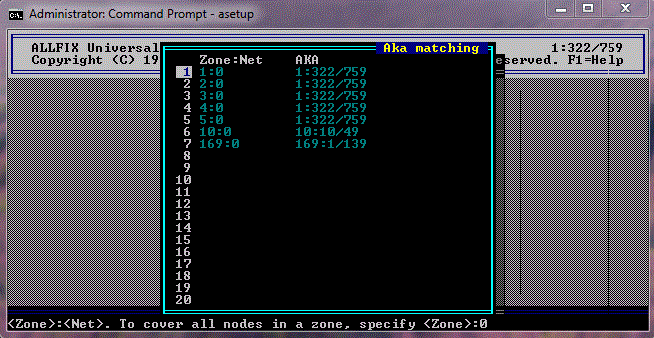
The AKA entered here is my AKA , Use your own aka there in that field
Next Step of the address maintence is the Domain Names Tab Click the tab and see illistration below
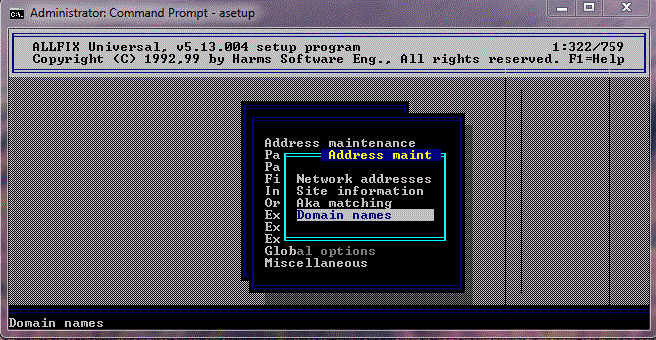
Domain Names Illistration is below You can add all your different domains here

This Concludes Step 2 we can now move onto the next section
Step #3
It is time to setup pathnames (part 1)
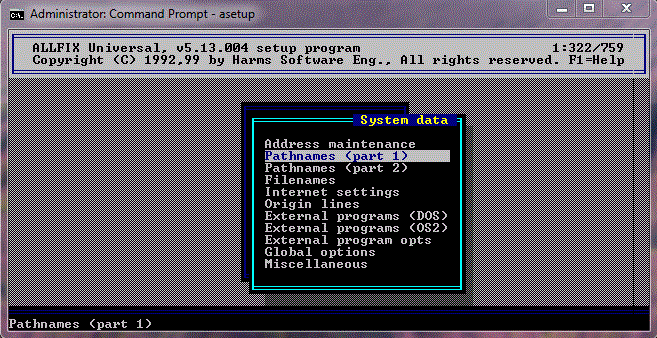
This is My Setup below With me using IREX as my mailer
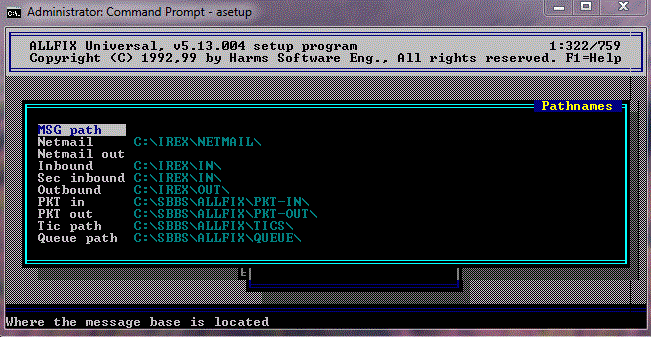
Below is the Next part Pathnames Part 2 See Below
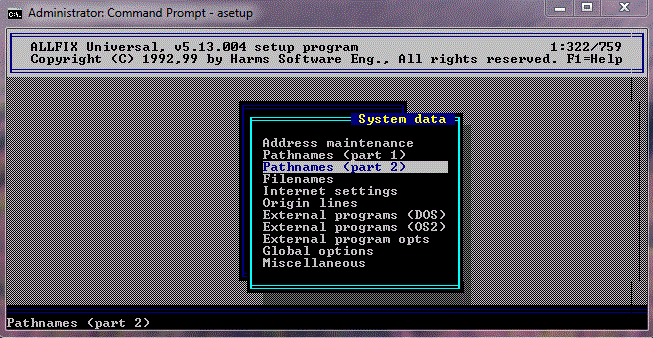
Click on Pathnames Part 2 and see the Illistration Below

Next we will go on to the next tab , Called Filenames
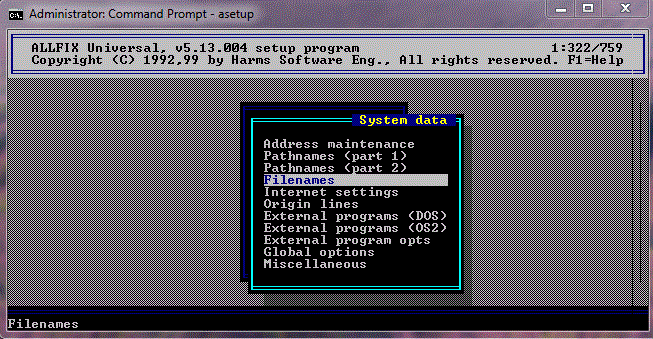
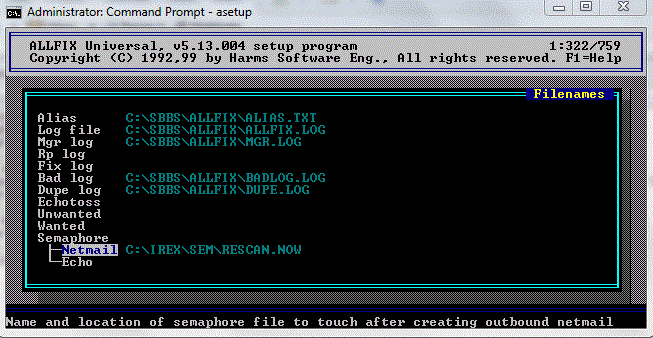
Click on the Filenames Tab and enter the Following Information Below
We will now move onto the Origin LinesTab
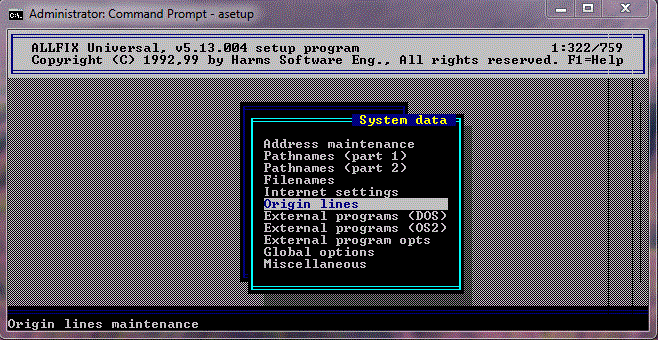
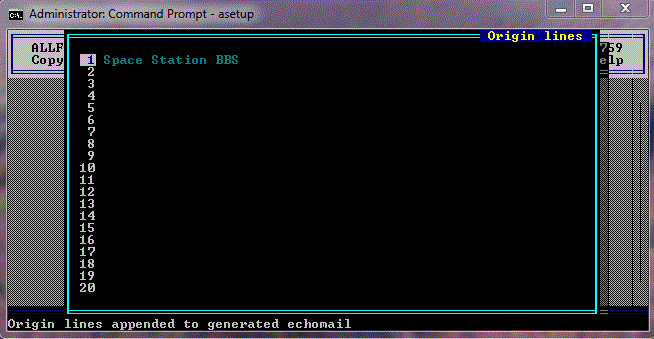
Click On the Origin Lines tab and enter your info in below illistration
Step #4
From Main Screen We will skip around a bit Click on Node Manager Tab,
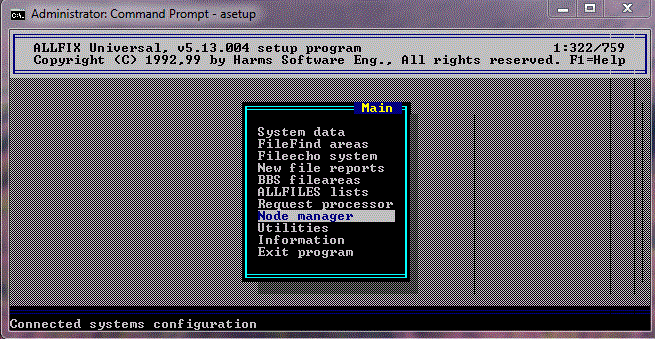
You will see the followin it will be blank Here is where you add all your Nodelinks
See below image
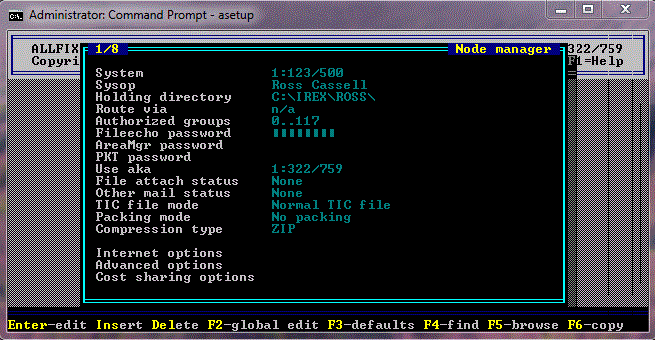
After All Your Nodes are Entered , Skip down to Group Manager See Below
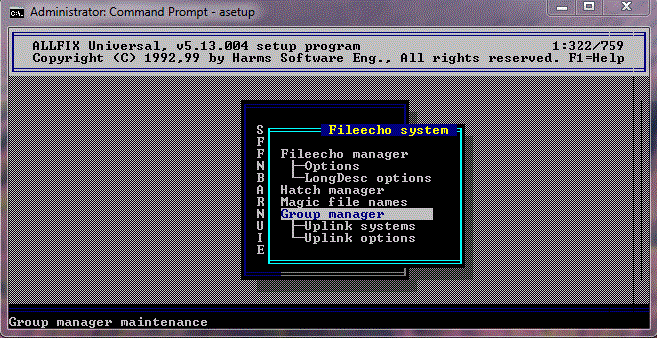
Click on Group Manger and You can begin Inserting your Groups Here

Once Completed with groups Move over to the File Echo system Tab That concludes this section
Step #5
Begin Setting Up file Echos in Allfix see below
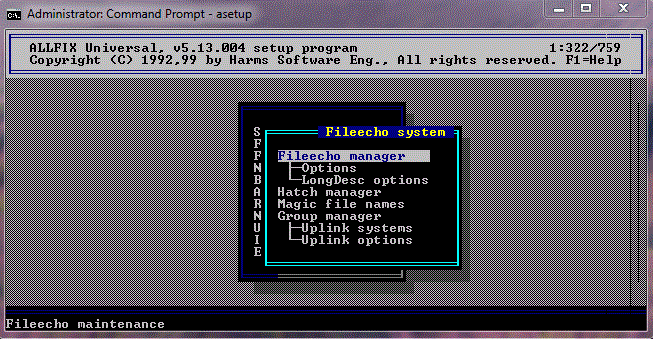
Here is an example Setup of a File Echo below, Press the insert key when ready to begin

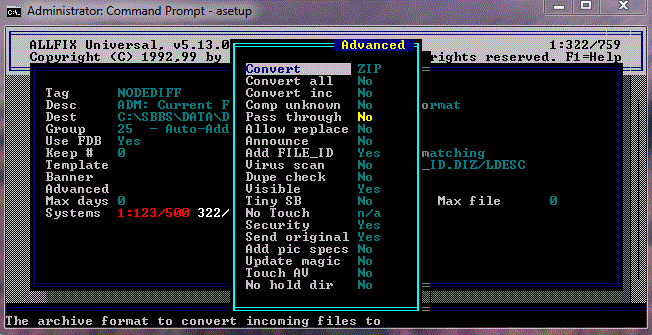
Below is the Advanced Tab Setting I use
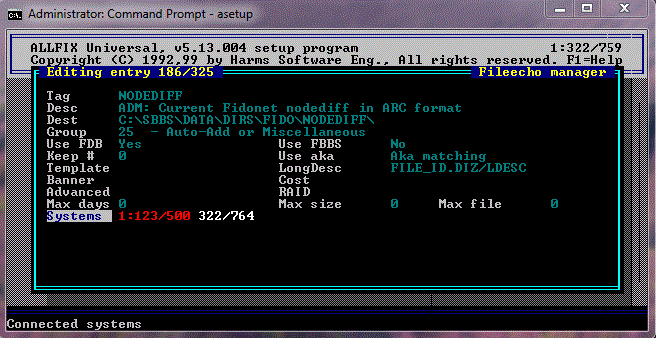
Below Is the Systems Tab Click on it to begin adding Your Systems to the Echo's
The Pic Below is for Someone You send Tic Files To Setup Exact in the send files tab
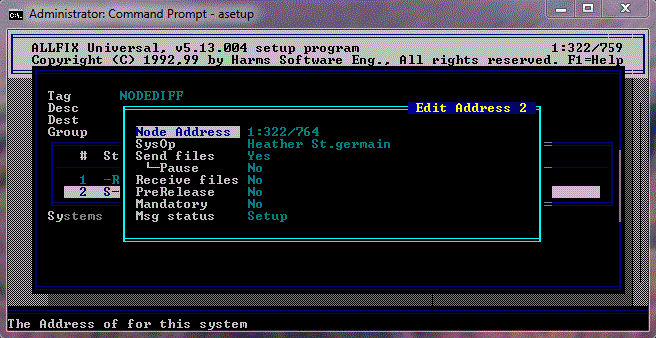
Below is the Setup for Someone You receive Tic Files From like your HUB

Step #6
Setting Up your File Hatching
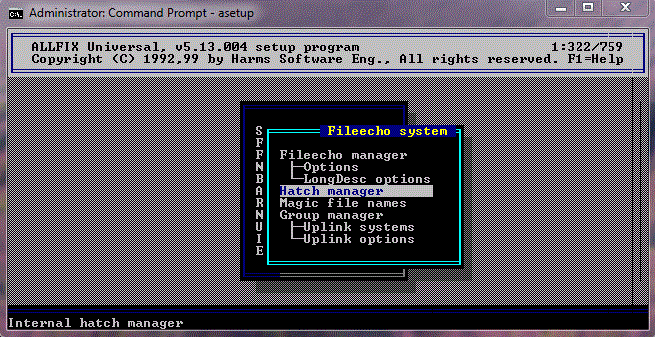
Click on Hatch manager and see below you will see the following it should be blank
I have setup an example File Area So that you can see how its done
you will need to insert all your file areas here that you wanna hatch files for

FINAL Step
Here In Conjunction With Tinytic is where I get allfix hatching and
Having tinytic Announce My Files in the areas The batch file should be exactly like this but set to your system
@echo off
c:
cd\sbbs\tinytic
tinytic
rem Combines header-announcement-footer together
copy header.txt+newfiles.txt+footer.txt announce.txt
cd\sbbs\exec
smbutil ic:\sbbs\tinytic\announce.txt -tAll -fSpace_bot -sReceived-Files c:\sbbs\data\subs\allfixfi.shd
smbutil ic:\sbbs\tinytic\announce.txt -tAll -fSpace_bot -sReceived-Files c:\sbbs\data\subs\gn.frek.shd
smbutil ic:\sbbs\tinytic\announce.txt -tAll -fSpace_bot -sReceived-Files c:\sbbs\data\subs\int.rcv.shd
smbutil ic:\sbbs\tinytic\announce.txt -tAll -fSpace_bot -sReceived-Files c:\sbbs\data\subs\Jn_FILES.shd
cd\sbbs\tinytic
cd\sbbs\exec
addfiles * /S /N /Z
sbbsecho /lesr!
sbbsecho /linf!
cd\sbbs\tinytic
if exist announce.txt del announce.txt
if exist newfiles.txt del newfiles.txt
cd\sbbs\allfix
allfix file
NOTE:
You must create a Header.txt and a footer.txt customized to your system and put them in tinytic dir
Also You must after you complete all the Allfix file echos setup run the fcomp command
The FCOMP in allfix for synchronet is FCOMP 21 c:\sbbs\ctrl
This will compile allfix File Echos to Synchronet BBS
Guess what:
That's it. You should have a working setup.