This document
contains screen shots and instructions to setup a basic Irex system. There are
many more things you can do to automate and make life easier, but following
these steps will get you started!
- I assume no liability what so ever if you follow any of the steps outlined
below. I am simply showing what I had to do to setup my Irex system.
- My thanks goes to the following people:
- Tom Jennings - For Creating the Fido Technology
- Charles Cruden - for writing Irex
- Roger Shays - for promoting it, helping me and other with its setup
- Bob Satti and Ward Dossche - for having the vision to permit and promote
the use of IP - Mailers, Flags and Nodelist entries in their respective
zones.
Step #1
UnRAR, UnZIP or otherwise de-arc the Irex files into a
directory of your choice. For purposes of this tutorial I have used C:\IREX
Step #2
Double click on REXCFGW.EXE
This is what you'll see:
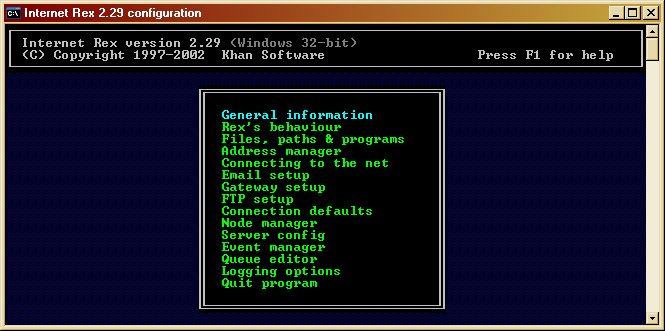
For this tutorial we assume your are not running a dial-up mailer and irex will be your only mailer.
Step #3
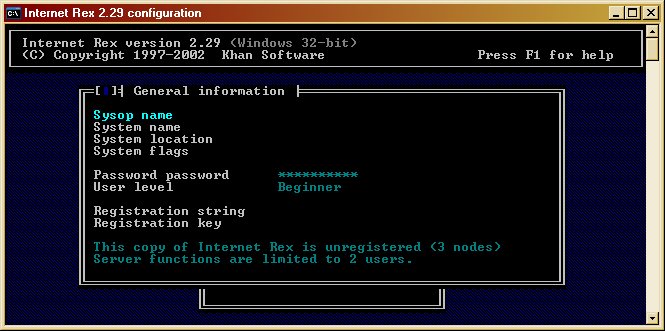
Fill in Sysop Name, System Name and System location. Then fill out system flags.
|
Flag
|
Meaning
|
|
CM
|
Node accepts mail 24 hours a day
|
|
MO
|
Node does not accept human callers
|
|
LO
|
Node accepts calls Only from Listed FidoNet addresses
|
|
IBN
|
denotes a system that does BINKP
|
|
ITN
|
denote a system that does TELNET
|
This by far isn't a complete list of flags, for a complete list see the bottom of your current nodelist.
Next enter a password if you want one to access the configuration with, if not leave blank. Choose your user level, the higher it is the more options will appear. For this tutorial we will assume the advanced level.
Last enter your registration codes if you have registered it, if not you are limited to 3 nodes. Note: Do not try the reg codes you see here as they are fake codes.
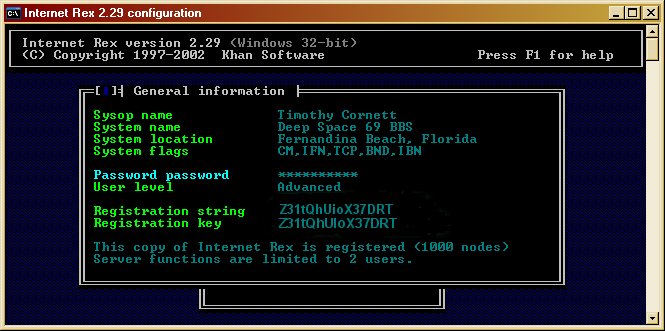
If done correctly it look like this:
Step #4
Highlight Rex's Behavior and push enter, you'll be presented with the following screen:
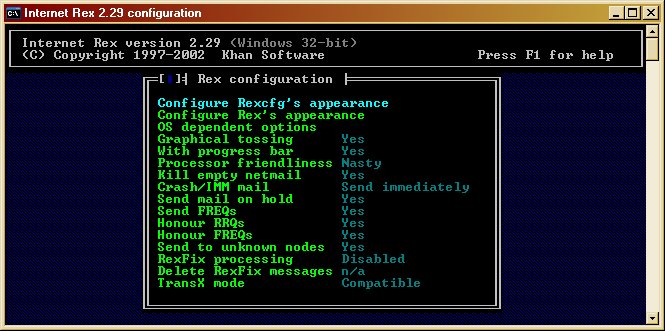
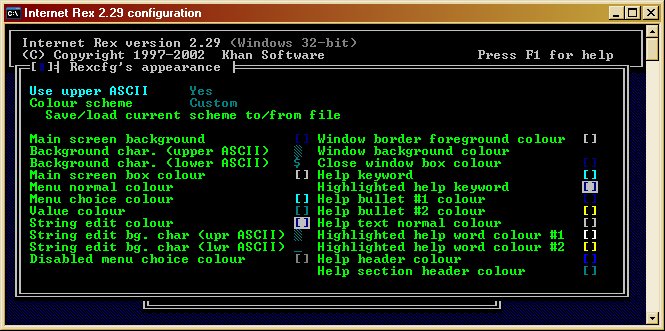
Push Enter on Configure Rexcfg's appearance and select your options or accept the defaults.
 >
>
When finished hit Esc, then highlight Configure Rex's appeareance and push enter.
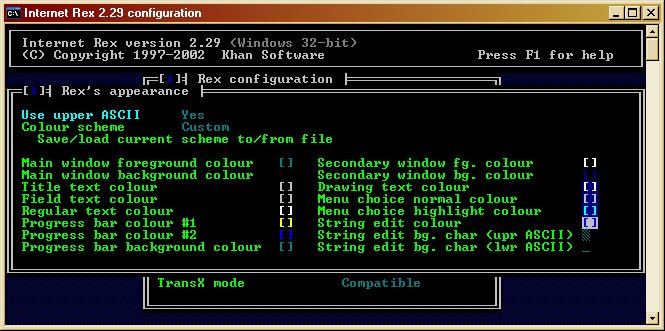
When finished in Configure Rex's appearance hit esc and Highlight OS dependant options. For this tutorial we'll assume a windows install
so select windows and press enter
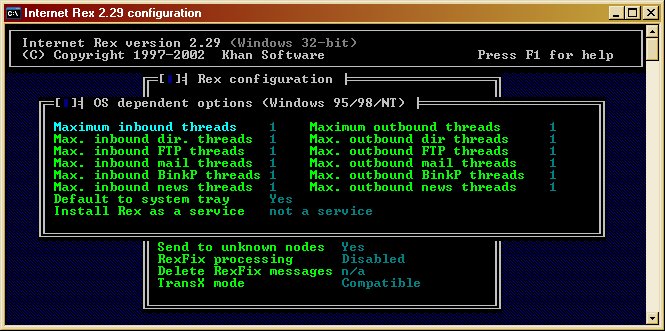
Make sure your settings match those in the above image, then hit esc and make sure the other options match those in the image below.
Then hit Esc to return to the main menu, highlight Files, paths & programs and hit enter.
Step #5
The screen below will appear.
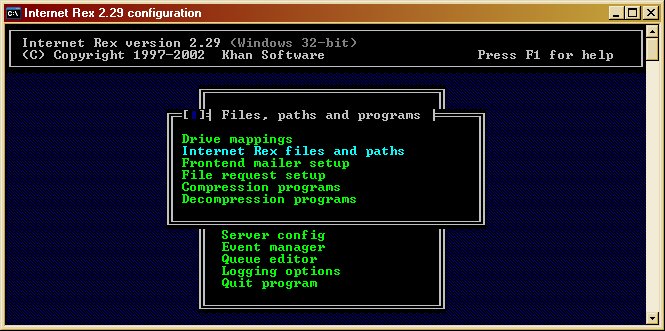
Highlight Internet Rex files and paths and hit enter. Fill out all paths listed as per your system config. Be sure that all directories exist on your system.
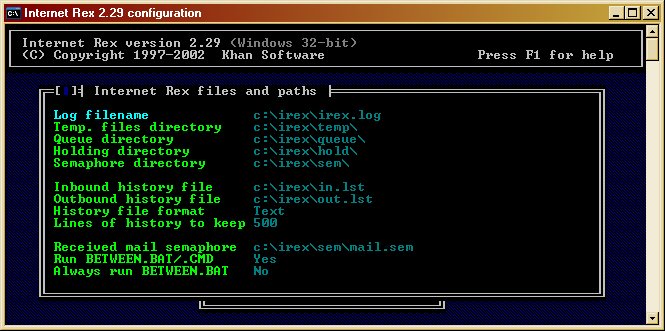
Hit Esc once to return to Files, paths and programs, highlight Frontend Mailer Setup
Step #6
You have reached the frontend mailer setup. From here you'll configure and
control all Irex mailer paths and types. I kept the defaults except of course the paths.
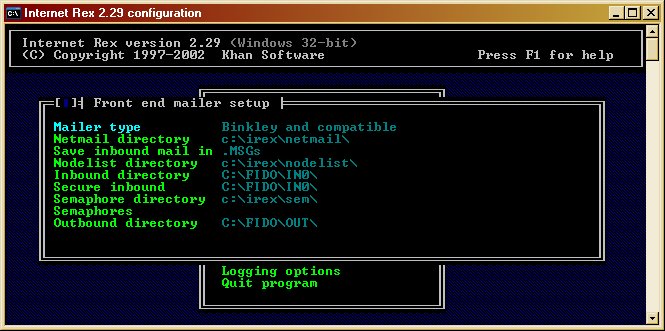
Step #7
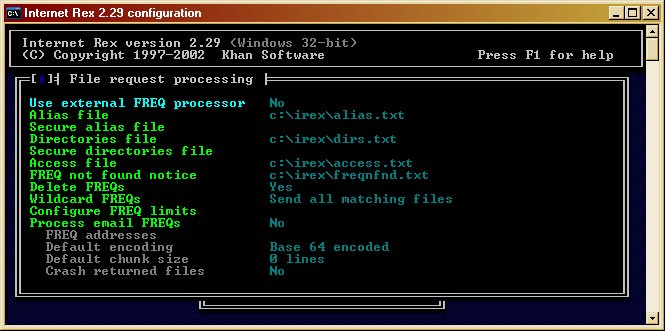
Next press esc to return to Files, paths and programs. Then if you want to be able to accept FREQ requests open the File request processing, fill out the paths as shown, making the files if neccessary.
Now press esc and hit esc again, this will bring you back to the main menu, highlight Address Manager and press enter, then press enter again to enter the address manager. Enter your Fidonet address as the main address, or if you are not a fidonet member enter your node number of whatever network as the main address, include all system AKAs below the main, when finished it should look similar to this:
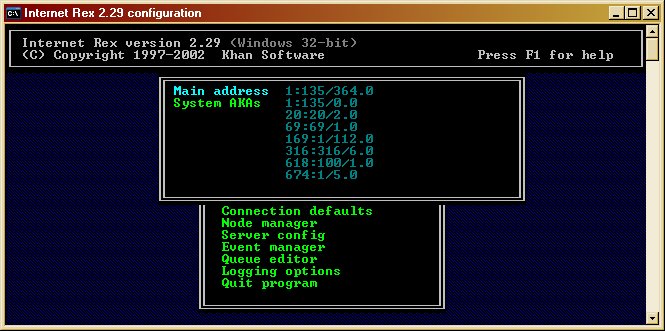
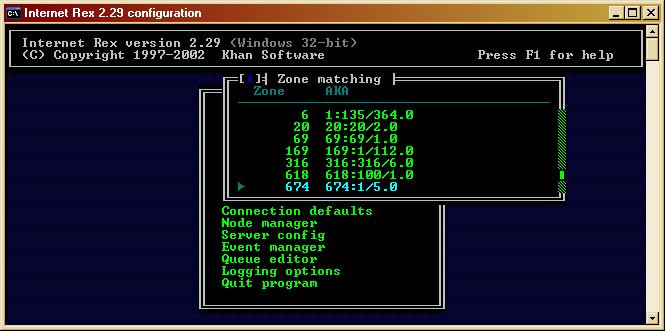
Next press esc once and you'll be in the address manager menu, highlight Zone matching and press enter, press insert to add a zone, list all zones from all of you network nodelists. As you enter a zone irex will prompt you for the AKA to use for that zone. Fidonet has zones 1-6, Gatornet is zone 69, Micronet is zone 618, ACnet is zone 63 or 80 depending on your node number.
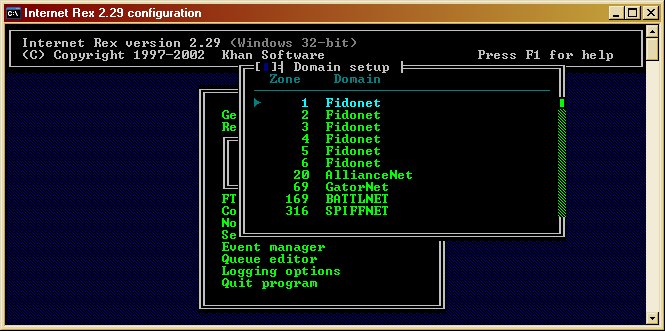
Next hit esc once to bring you back to the address manager menu, highlight domain setup, press insert to enter zones, enter all your zones again, this time irex will prompt you for the domain used for each zone, enter the network name, it'll look similar to this.
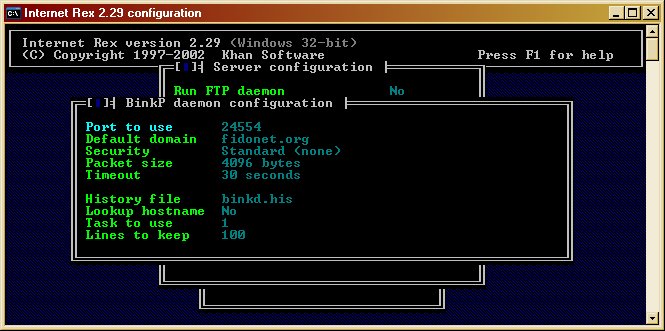
When done press esc twice to return to the main menu, highlight server config and hit enter, come down to Run BinkP daemon and hilight Configure under that and set it up as shown, this tutorial only get the minmum required binkp over the internet set-up, to set-up the rest you'll have to read the rex.doc.
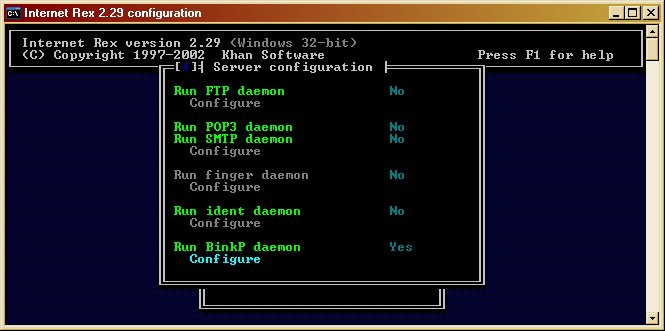
Hit esc when done and make sure your server config looks like this picture below.
Step #8
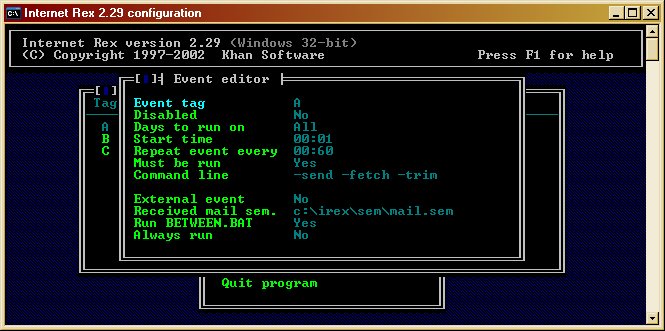
Hit esc to return to main menu and highlight event manager, Event A should already be there, if it isn't press insert to add an event.
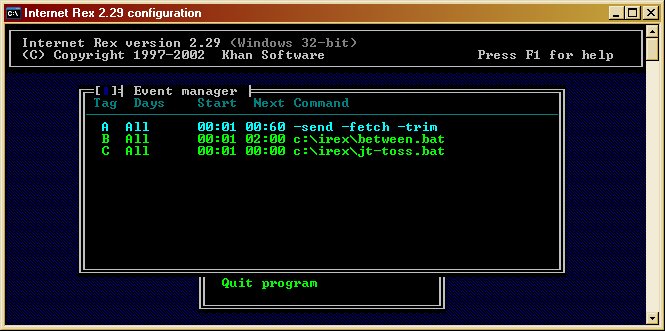
Event A is a required event, entering it as shown below allows for callouts every hour to your hub or downlinks.
To add other events hit insert, give it a unique letter tag and fill in the prompts. You can use irex to run all of your events if you choose to.
Step #9
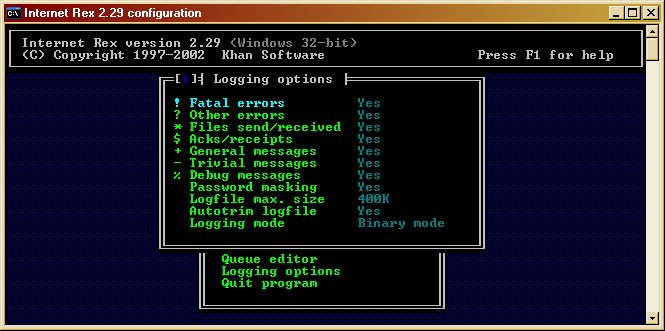
Hit esc twice when done to return to the main menu, highlight logging options and hit enter, fill out your preffered logging options
Step #10
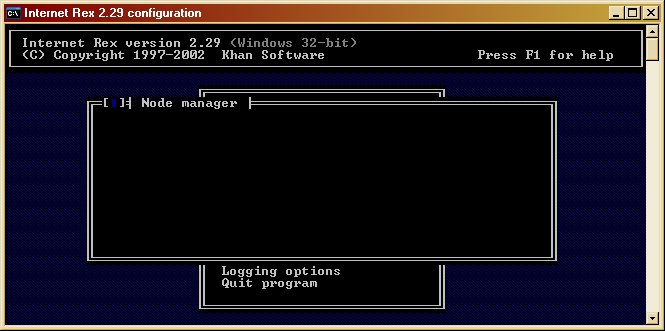
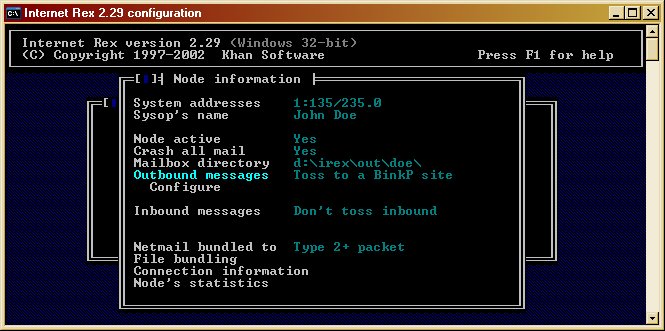
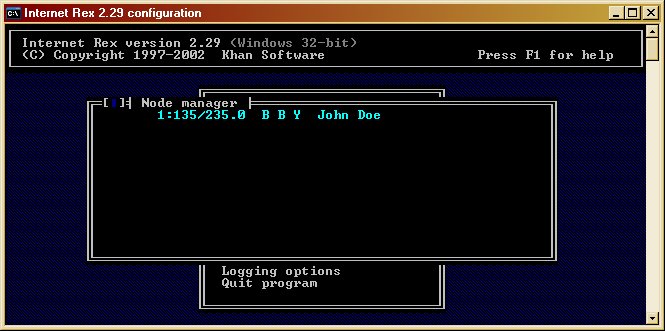
When done hit esc once to return to the main menu and we move to the final step adding you uplinks and or downlinks. At main menu highlight node manager and press enter, press enter again to start entering hubs or downlinks
- System Addresses: Means remote node's fidonet or other FTN node number
- Sysop's Name: Hopefully this is self-explanatory
- Node Active: Must be set to YES or his mail is on hold for him to call in and pick up
- Crash All Mail: Set to Yes
- Mailbox directory: This is the path to this nodes outbound directory. Irex will create it if it isn't there. This option only available if User level set to advanced or higher.
- Outbound Messages: Set to Toss to a BinkP site
Next highlight configure under outbound messages and hit enter
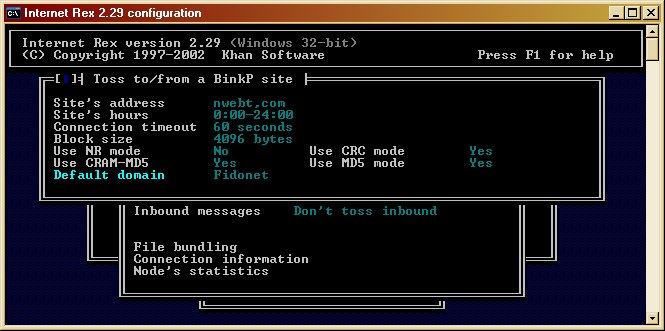
- Site's address: Is the remote nodes mailer address, usually the same as his BBS, i.e. my mailer address is nwebt.com
- Site's hours: Is the time range the remote node will allow mail to be transfered
- Connection timeout: is self explanatory
- Leave Use NR mode, Use CRC mode, Use CRAM-MD5 and Use MD5 mode at the default settings
- Default Domain: Is the network name you are tossing packets to-from
Now hit esc once to return to previous menu, highlight Inbound messages and set to Toss From a BinkP site
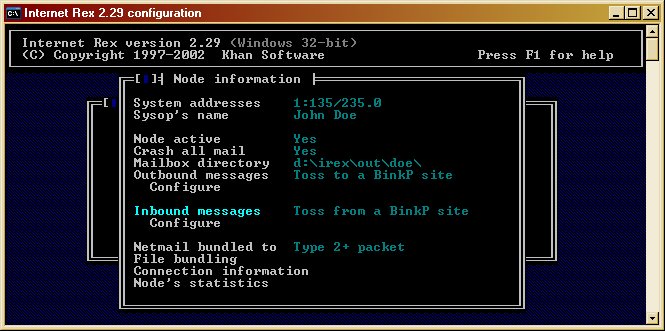
Then highlight configure under inbound messages and verify all info is correct
Press esc to return to previous menu. Your Screen should look like this when finished. Make sure to use type 2+ packet

Step #11
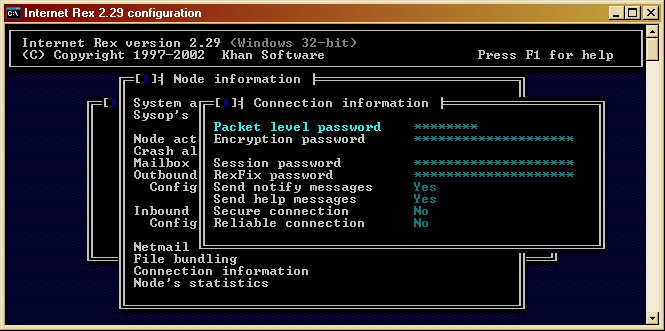
Next... passwords. Highlight Connection information and push enter. Here is where you set up the different password each remote node may require, usually you'll only need a session password.
Repeat Steps 10 and 11 until all your hubs or downlinks are entered, when done your node manager should look like this
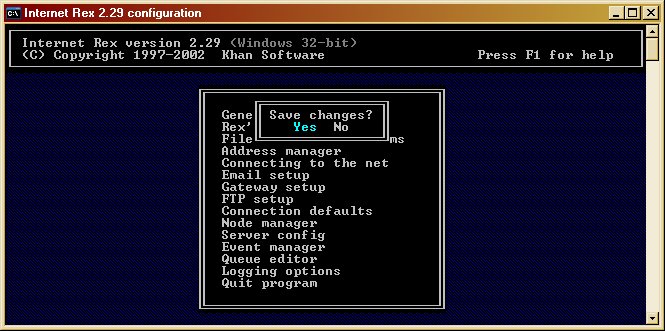
Once finished hit esc to return to the main menu highlight Quit Program, when irex asks save changes make sure yes is highlighted and push enter.
That's it. You should have a working setup.